Using a premium microphone won’t fix poor recording habits. If you neglect room acoustics or don’t experiment with placement, your recordings will sound muddy or unprofessional, no matter how expensive your gear. Properly treating your space and positioning your microphone correctly are just as important as the microphone itself. Small adjustments can make a huge difference. Keep exploring, and you’ll discover how crucial good habits truly are for capturing clear, high-quality sound.
Key Takeaways
- Even high-quality microphones can’t compensate for poor room acoustics or improper placement.
- Bad recording habits, like incorrect mic positioning, degrade sound quality regardless of microphone premium status.
- Proper environment setup and technique are essential to maximize a microphone’s potential.
- Small adjustments in habit and space can significantly improve recording clarity, beyond gear investment.
- Relying solely on expensive gear ignores the critical role of acoustics and technique in professional sound quality.
Even with a top-tier microphone, poor recording habits can still ruin your sound quality. The truth is, no matter how expensive your gear is, if you don’t pay attention to your environment and technique, your recordings will suffer. One of the biggest factors influencing your sound is room acoustics. If your space is full of hard, reflective surfaces like bare walls, windows, or tile floors, your voice or instrument will bounce around, creating echoes and unwanted reverb. This not only muddles your sound but also makes it difficult to capture a clear, professional recording. To improve, you need to contemplate how your room absorbs or reflects sound. Soft furnishings, rugs, and acoustic panels can help tame reflections, giving you a cleaner sound. You don’t need a studio-grade space; even small adjustments can make a huge difference.
Alongside room acoustics, microphone placement plays a pivotal role in your recording quality. It’s tempting to just set your mic in front of you and record, but that’s rarely ideal. Proper placement ensures your voice or instrument is captured accurately and with minimal background noise or interference. You should experiment with distance and angle—sometimes moving your mic just a few inches can drastically improve clarity. For vocals, keeping the microphone about 6 to 12 inches away and slightly off-axis can reduce plosives and sibilance, resulting in a smoother sound. For instruments, positioning the mic closer to the sound source enhances detail and reduces room noise. Remember, the goal is to find the sweet spot where your sound is rich, clear, and balanced.
It’s also essential to be conscious of how your room’s acoustics interact with your microphone placement. For example, placing your mic too close to a reflective surface can cause unwanted echoes, while positioning it too far away might pick up more room noise than desired. You need to find a balance—testing different spots and angles until you identify where your sound is most natural and clean. This process takes patience, but it’s worth the effort. Good microphone placement combined with an acoustically treated space will markedly elevate your recordings, making your premium microphone truly shine. Ultimately, investing in high-quality gear won’t make a difference if you overlook these fundamental habits. Your recording environment and technique are just as important, if not more so, than your equipment. Being aware of the room acoustics and how they influence your recordings can lead to significantly better results, especially if you optimize your microphone placement accordingly.

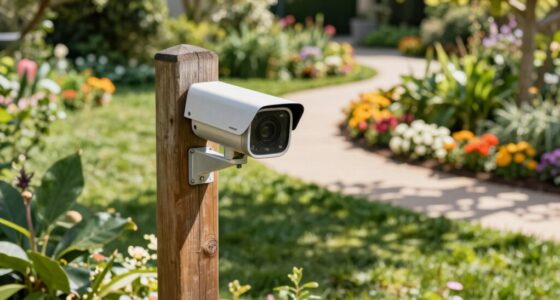
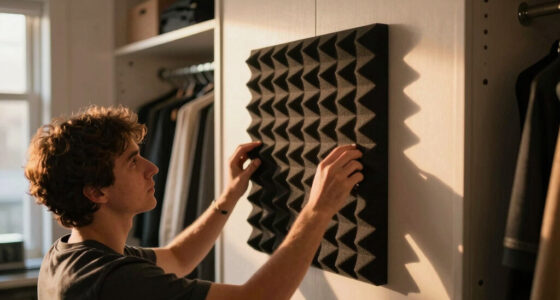
6 Pack Self-adhesive Acoustic Panels,15.75" X 31.5" X 0.47" Soundproof Wall Panels, High Density Beveled Edge Sound Absorbing Panels, Acoustic Treatment for Studio Home and Office (Black)
- Safe and Attractive Material: Made of non-toxic, flame-retardant polyester fiber
- Easy Self-Adhesive Installation: No tools needed, quick to install with adhesive backing
- Enhanced Acoustic Performance: Reduces echo and reverberation for better sound quality
As an affiliate, we earn on qualifying purchases.
As an affiliate, we earn on qualifying purchases.
Frequently Asked Questions
Can Software Improvements Compensate for Poor Microphone Technique?
Software improvements can help, but they can’t fully fix poor microphone technique. Post processing techniques like equalization and noise reduction can minimize some issues, but if your recording environment lacks acoustic treatment or your technique causes distortion, the results still suffer. You need good mic technique and proper acoustic treatment first. Then, software can enhance your recordings, but it’s no substitute for proper habits and environment.
Are There Specific Microphones Better Suited for Certain Recording Environments?
Think of your recording environment as a stage; the right microphone is your spotlight. For noisy rooms, dynamic microphones act like shields, blocking unwanted sounds. In quiet spaces, condenser mics capture delicate details like a painter with fine brushes. Microphone compatibility matters too—choose a mic that matches your gear to guarantee harmony. Picking the right microphone for your environment transforms your space into a studio, elevating your sound to professional heights.
How Much Does Microphone Placement Impact Overall Sound Quality?
Microphone positioning greatly impacts sound quality and consistency. When you carefully adjust the placement, you capture clearer, more balanced audio. Proper microphone positioning minimizes unwanted noise and emphasizes your voice or instrument. Poor placement can cause muffled sounds or distortion, regardless of your mic’s quality. So, by paying attention to microphone positioning, you guarantee better sound consistency and a professional-quality recording, even if your equipment isn’t top-tier.
Do Different Microphone Types Require Unique Handling or Adjustments?
Yes, different microphone types require unique handling and adjustments. For example, condenser mics benefit from proper calibration to guarantee accurate sound, and dynamic mics may need closer placement. You should also use a pop filter to reduce plosive sounds, especially with vocal microphones. Adjust your positioning based on the mic type, and always calibrate your microphone to optimize sound quality. Proper handling makes a significant difference in your recording results.
What Common Mistakes Do Beginners Make When Recording Audio?
You often make mistakes like recording in noisy environments or not paying attention to your vocal technique. Poor recording environments introduce background noise, while bad vocal technique can cause distortion. To improve, choose a quiet space and use proper mic placement. Focus on maintaining consistent distance from the microphone and controlling your breathing. These habits help guarantee clearer recordings, no matter what microphone you use.
Conclusion
Remember, a premium microphone is like a fancy sports car—it can’t turn a clunker into a race winner. If you don’t master your recording habits, even the best gear won’t deliver professional sound. Focus on your technique first, then upgrade your equipment. Think of your microphone as a paintbrush—you need skill and practice to create a masterpiece. Keep honing your habits, and your recordings will shine brighter than any high-end gear ever could.