
TL;DR
The most effective way to improve closet recordings isn’t just adding foam—it’s strategic placement and soundproofing. Moving your rig out of sight and mind, combined with targeted treatment, dramatically reduces noise and echo. A well-ventilated closet can become a quiet, professional-sounding space with smart tweaks.
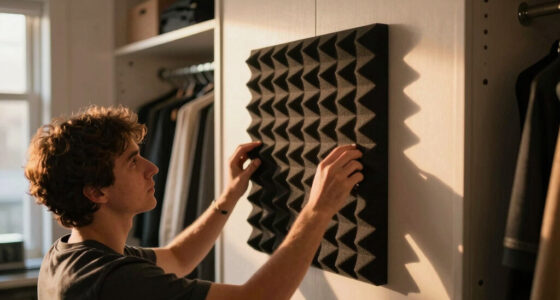
Ever noticed how tiny closet recordings often sound muffled or boxy, yet the same space can be transformed into a surprisingly good vocal booth? The secret isn’t just about slapping foam panels everywhere. It’s about understanding how sound behaves in small spaces and using placement and treatment to your advantage.
If you’re tired of your rig blaring through your walls or your recordings sounding hollow, this guide will show you how to turn a cramped closet into a quiet, effective studio—without spending a fortune. It’s about smart moves, not expensive gear.
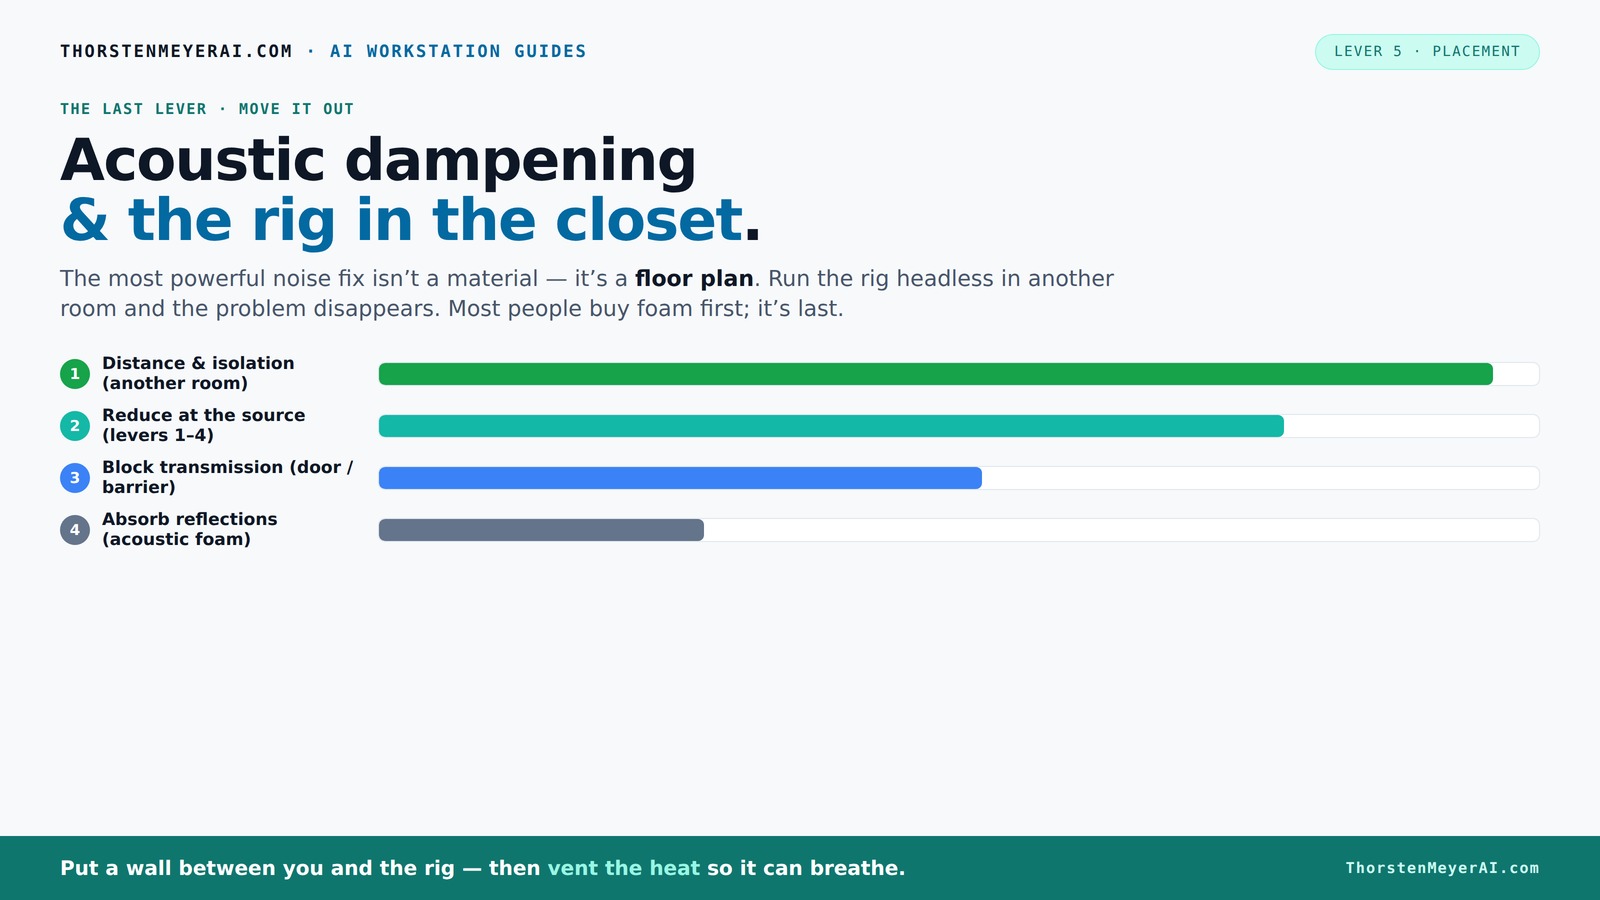
Acoustic dampening
& the rig in the closet.
The most powerful noise fix isn’t a material — it’s a floor plan. A rig you can’t hear because it’s in another room beats any amount of foam. Tap the approaches in Part 1 to see what actually works.
(another room)
(levers 1–4)
(door / barrier)
(acoustic foam)
Contain the noise, not the heat
Key Takeaways
- Moving your rig to another room or closet is the most effective way to reduce noise, often more than acoustic foam.
- Proper ventilation is crucial if you place a hot, high-power machine in a closet—without airflow, heat will build up fast.
- Targeted placement of panels—behind the mic, on side walls, and the ceiling—maximizes sound quality in small spaces.
- Bass traps are helpful only if low-frequency issues are evident; don’t overbuy for small closets.
- Sealing gaps around the door and using blankets or foam panels can greatly improve isolation and reduce reflections.

Focusound 52 Pack Acoustic Foam Panels 1" x 12" x 12" Sound Proof Foam Panles Soundproofing Noise Cancelling Wedge Panels for Home Office Recoding Studio with 300PCS Double-Side Adhesive
- Soundproofing Design: Triangular grooves for noise absorption
- Includes Adhesive Tape: 300pcs double-sided adhesive for easy installation
- Easy Shape Recovery: Reforms after soaking in water
As an affiliate, we earn on qualifying purchases.
As an affiliate, we earn on qualifying purchases.
Why Moving Your Rig Is the Single Biggest Noise Fix
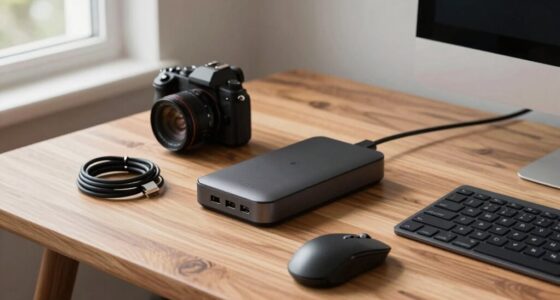
Moving your noisy machine into another room or closet is the most effective way to cut down on sound. Think of it as putting a giant sound shield between you and the racket. When you access your AI rig remotely, the noise it makes no longer needs to be part of your workspace.
For example, a typical GPU rig running at full tilt can hit 80-90 dB—loud enough to be disruptive. But if you place it in a closet on the other side of the house, you’ll barely hear it, even during heavy workloads. It’s the simplest, most cost-effective fix. Just make sure you have a fast wired network connection, and ensure the space has good ventilation to prevent overheating.
According to industry advice, distance and isolation beat any foam or panel upgrade for noise reduction, hands down. This is because sound diminishes with distance, and barriers prevent sound waves from traveling directly into your recording space. The tradeoff is that moving equipment might reduce convenience and requires some planning, but the payoff in noise reduction is significant and often overlooked.
The 'Rig in the Closet' Setup — How to Keep It Cool and Quiet
Sealing a closet for a rig sounds great—until heat builds up. A closed space traps heat like a sauna, which can throttle your hardware and cause fans to scream. So, the key is ventilation. You need a way for hot air to escape without letting sound leak out.
Use passive vents or quiet exhaust fans, and consider a purpose-built soundproof cabinet that combines acoustic foam with temperature-controlled airflow. For example, some creators install ducted exhausts or small radiator fans to keep everything cool. Without proper airflow, your high-powered rig might just bake itself—while noise remains trapped inside.
Choosing the right ventilation method involves balancing noise reduction with cooling efficiency. Ducted systems can be quieter than open fans but require careful installation. The tradeoff is complexity versus noise level; a well-designed system minimizes both heat and sound escape, but may cost more upfront. Proper airflow prevents overheating, which is crucial for hardware longevity and consistent performance, especially in confined spaces.
Acoustic Treatment vs. Soundproofing: What’s the Difference?
Acoustic dampening and soundproofing are two sides of the same coin but serve different purposes. Acoustic treatment focuses on reducing echoes and flutter within the room—think of it as making the space sound better for recording. Soundproofing, on the other hand, blocks sound from escaping or entering the space.
In a tiny closet studio, you can install thick blankets, acoustic panels, or reflection filters to soften reflections. But to stop sound leakage through doors or walls, you need barriers, sealing gaps, and mass. For example, adding drywall with damping compounds like Green Glue can boost isolation but costs more and involves more work.
Understanding these differences is important because it influences your choice of materials. Acoustic treatment improves the clarity and quality of your recordings but doesn't prevent sound from disturbing neighbors or leaking outside. Conversely, soundproofing is essential if you need to contain noise—like late-night recordings—to avoid complaints. The tradeoff is that soundproofing tends to be more labor-intensive and costly, so prioritize based on your specific needs.
Where to Place Acoustic Panels for Maximum Effect in a Closet
Positioning matters more than you think. The first reflection point—where sound bounces directly from your voice to a wall—is critical. Place panels behind the mic, at ear level, and on side walls at the same height. Ceiling treatment can also drastically improve clarity, especially in a tiny space where sound reflects off the ceiling and floor.
For example, if you’re recording vocals in a closet, put a foam panel just behind the mic to catch early reflections. Add another panel on the side wall at head height. Cover the ceiling with a thin acoustic panel or hanging blanket. This targeted placement makes a big difference in reducing echo and boxiness.
Pro tip: use a mirror trick to find reflection points—sit with a mirror and see where the panels should go. Proper placement ensures that sound waves are absorbed or diffused at points where they would otherwise cause comb filtering or echo, thus creating a clearer, more natural sound. The tradeoff is that strategic placement maximizes effectiveness without cluttering your space with unnecessary panels.
Do You Need Bass Traps in a Small Closet? Yes or No?
Bass traps are designed to soak up low-frequency buildup, which is common in small, enclosed spaces. In a tiny closet, parallel walls and limited volume can cause bass to echo and create a muddy sound. If your recordings sound boomy or hollow, bass traps could help improve clarity and accuracy in your recordings.
But if your low end is tight and balanced, you might not need them. Start with basic treatment and add bass traps only if you notice a problem. Usually, 2-inch thick panels are enough for small closets, but for larger or more problematic spaces, 4-inch traps are better. The key is diagnosing your room’s low-frequency response—if you hear a lot of boom, bass traps are a worthwhile investment. They can also help prevent low-frequency phase issues that can make your recordings sound unfocused.
For detailed guidance, see this link.
How Many Panels Do You Really Need in a Tiny Closet?
The number of panels needed depends on your space and goals. For detailed guidance, see this link.anels depends on your space size and budget, but a good rule of thumb is to start with at least four or five panels covering the main reflection points. For a small closet—roughly 4x4 feet—two panels behind the mic, one on each side wall, and a ceiling panel can significantly improve sound quality. This setup targets the primary reflection areas that cause muddiness and echo, which are especially problematic in confined spaces.
For example, a typical setup might include:
- One panel behind the mic to absorb direct reflections
- Two side panels at ear level to reduce lateral reflections
- One ceiling panel or hanging blanket to prevent reflections from above
Adding bass traps or additional panels depends on your specific acoustics. Remember, targeted placement beats quantity in small spaces because over-treating can deaden the room or make it sound unnatural. Focus on the reflection points that most affect your recordings to achieve a balanced sound.
Are Reflection Filters Enough for Recording Vocals?
Reflection filters are a practical shortcut to improve vocal recordings in a closet. They block early reflections directly from the sides and rear, making your voice sound clearer and more professional without permanent wall treatments. They work by isolating the microphone from room reflections, which is especially useful when space is limited.
However, they don’t address low-frequency issues or sound leakage. For best results, combine a reflection filter with strategic placement of panels behind and around the mic, plus some room sealing. Think of the filter as one piece of a larger puzzle. Relying solely on a reflection filter can leave your recordings vulnerable to muddiness from low-end buildup and room noise. The tradeoff is that while reflection filters are quick and affordable, they are less effective at controlling room acoustics comprehensively.
Many creators swear by these filters as a quick, affordable upgrade for home recordings, but for professional-quality results, they should be part of a broader treatment plan.
Will Blankets or Foam Panels Help in a Closet Studio?
Both blankets and foam panels absorb reflections, but their effectiveness depends on density and placement. Thick moving blankets or heavy quilts can be surprisingly good at reducing echo, especially when placed on walls, floors, or doors. They are versatile for blocking sound leaks and damping room reflections, making them an affordable solution for small spaces.
Foam panels are designed for acoustic treatment—thinner but more targeted. They excel at controlling mid and high frequencies but are less effective at absorbing low frequencies unless they are thick or strategically placed. Combining both gives you flexibility: use blankets on the door or ceiling to block leaks and damp reflections, and panels on reflection points to improve clarity. This approach allows you to customize your treatment based on specific problem areas, balancing cost, coverage, and effectiveness.
For example, hanging a thick blanket over the closet door can significantly cut noise leakage and reduce reflections, while foam panels on side walls improve clarity. The tradeoff is that blankets are less durable and less precise but more versatile, whereas foam panels are more consistent but limited to specific frequencies.
How to Seal the Closet Door for Better Sound Isolation
Sound leaks through gaps around the closet door, making your recordings less isolated. Sealing these gaps is simple and effective. Use weatherstripping, acoustic sealant, or a draft stopper to block the leaks. This prevents sound from escaping and external noise from entering, which is crucial for maintaining a controlled recording environment.
For example, a thick draft-proofing strip along the door frame can dramatically reduce sound escape. Adding a moveable blanket or a fold-down door seal can enhance isolation further. When sealing, consider the type of door—solid core doors provide better isolation than hollow ones, but sealing gaps around hollow doors can still make a noticeable difference. The tradeoff is that some sealing methods may slightly reduce accessibility or airflow, so balance sound isolation needs with ventilation considerations. Proper sealing complements other acoustic treatments, ensuring that your efforts in absorption and reflection control are not undermined by leaks.
Frequently Asked Questions
What is the difference between acoustic treatment and soundproofing?
Acoustic treatment improves how sound behaves inside a space—reducing echo and flutter—by absorbing or diffusing sound waves, which results in clearer recordings with less coloration. Soundproofing, on the other hand, involves adding barriers, mass, and sealing gaps to prevent sound from escaping or entering the space, thus isolating it from external noise or preventing noise leakage. In a small closet, treatment makes your recordings sound more natural and less reflective, while soundproofing ensures external sounds don’t intrude and your noise doesn’t disturb neighbors. Both are important but serve different goals: one enhances sound quality internally, the other controls sound transmission externally. The tradeoff is that soundproofing often requires more effort and investment but is essential if external noise is a concern.
Where should I place acoustic panels in a closet studio?
Place panels at the primary reflection points—behind the microphone, at ear level on side walls, and on the ceiling directly above the recording area. These locations are where sound waves bounce and reflect most intensely, causing echo and muddiness. Proper placement absorbs these reflections, resulting in a more natural and controlled sound. Use a mirror to identify reflection points: position panels where you see the mirror reflecting the microphone or your head when sitting at your setup. This strategic placement maximizes the effectiveness of your treatment without cluttering the space with unnecessary panels, ensuring a balanced sound while maintaining a compact environment.
Do I need bass traps in a small closet?
Only if you notice a boomy or muddy low end in your recordings. Low-frequency buildup is common in small, enclosed spaces due to parallel walls and limited volume, which can cause certain bass notes to resonate excessively. Bass traps absorb these low frequencies, preventing phase issues and improving clarity. They are especially useful if your recordings sound hollow or muffled in the low end. For most small closets, starting with 2-inch thick traps placed in corners is sufficient; larger or more problematic spaces may benefit from 4-inch traps. The key is to diagnose whether low-frequency issues are present—if so, adding bass traps will enhance the accuracy of your recordings and make them sound more professional.
How many panels do I need for a small closet?
Start with at least four to five panels focused on the most critical reflection points: behind the mic, on side walls at ear level, and on the ceiling. This targeted approach addresses the main sources of echo and flutter, which are most problematic in small spaces. For a typical 4x4-foot closet, this setup significantly improves clarity without over-treating the room, which can deaden the sound and make it unnatural. Additional panels or bass traps can be added if specific issues are identified, but the initial focus should be on strategic placement of a few key panels to achieve a balanced, natural sound.
Will blankets or foam panels actually help?
Yes, thick blankets and heavy quilts are effective at reducing reflections and sound leakage because of their density and ability to absorb a broad range of frequencies. When placed on walls, doors, or ceilings, they dampen room reflections and prevent external noise from entering. Foam panels are more specialized, designed to target mid and high frequencies through absorption. While foam panels are consistent and easier to position precisely, blankets offer versatility and can be quickly deployed in different parts of the room. Using both in combination—blankets on doors and reflection points with foam panels—provides a more comprehensive approach to controlling sound in a small closet. The tradeoff is that blankets may be less durable and less precise, but their flexibility makes them invaluable in tight spaces.
Conclusion
Turning a closet into a quiet, productive studio isn’t about throwing in foam panels—it's about smart placement, sealing leaks, and giving your rig room to breathe. With a little effort, your tiny space can sound surprisingly professional while keeping noise contained.
Remember: the best soundproofing starts with distance. Keep your rig out of sight, out of earshot, and focus on the details that matter most—targeted placement, proper airflow, and sealing gaps. That’s the real recipe for a closet that works.